Using the Cart Plugins In Your Own Design (Part 1)
The Site Store Pro Dreamweaver and Designer shopping carts come with many pre-built display (‘widget’) plugins to allow you to apply common cart features easily to any page on your site.
If you are using the included complete sample store as your starting point, most of the plugins are already active on the site design and you control all their features directly from your /estore_admin/ under the /plugins/ and CMS areas. The sample store included with the cart is designed as a turn-key solution where you probably only will need to modify the CSS files to fine tune the colors, fonts, etc, and replace the sample content with your own products and company info and then you can use it as a fully-functional website and online store.
However, if you are using your own custom design and/or including Site Store Pro on an existing site, you usually will want to keep your current content as-is and simply use the Site Store Pro cart as an "add-on" to the website. In this situation, you typically will want to use some of the plugins inside your current design for functionality such as a Quick Cart Display and Featured Content Scrollers.
In this tutorial we will take a vanilla home page design and add the required cart framework include file and a simple cart feature display plugin to the page. Note: If you have not downloaded and extracted the shopping cart on your local system and uploaded the files to your server and activated the cart, please follow the steps in the install guide first.
(You can click on any image in the tutorial to enlarge it.)
Plugin Types For Custom Designs
Plugins that can be included in your own design are specified as types: DISPLAY, QUICKCART, SEARCHBAR, SIDENAV (side navigation menu) OR TOPNAV (top navigation menu). All other plugin types are for cart functionality such as product image viewers, payment processors and shipping providers and not used for display elements.
Add Cart Framework To Your Page
In order to use the display plugins in your own design, you must add the cart framwork's include file to top of any page that you want to include the features. Note: your page must be a .php file to use the cart functions. If your page is a .html or .htm, simply rename it to .php. Example if your site home page is index.html, rename it to index.php (make sure that you update your menus and any links that point to the .html page and change those links to be .php)
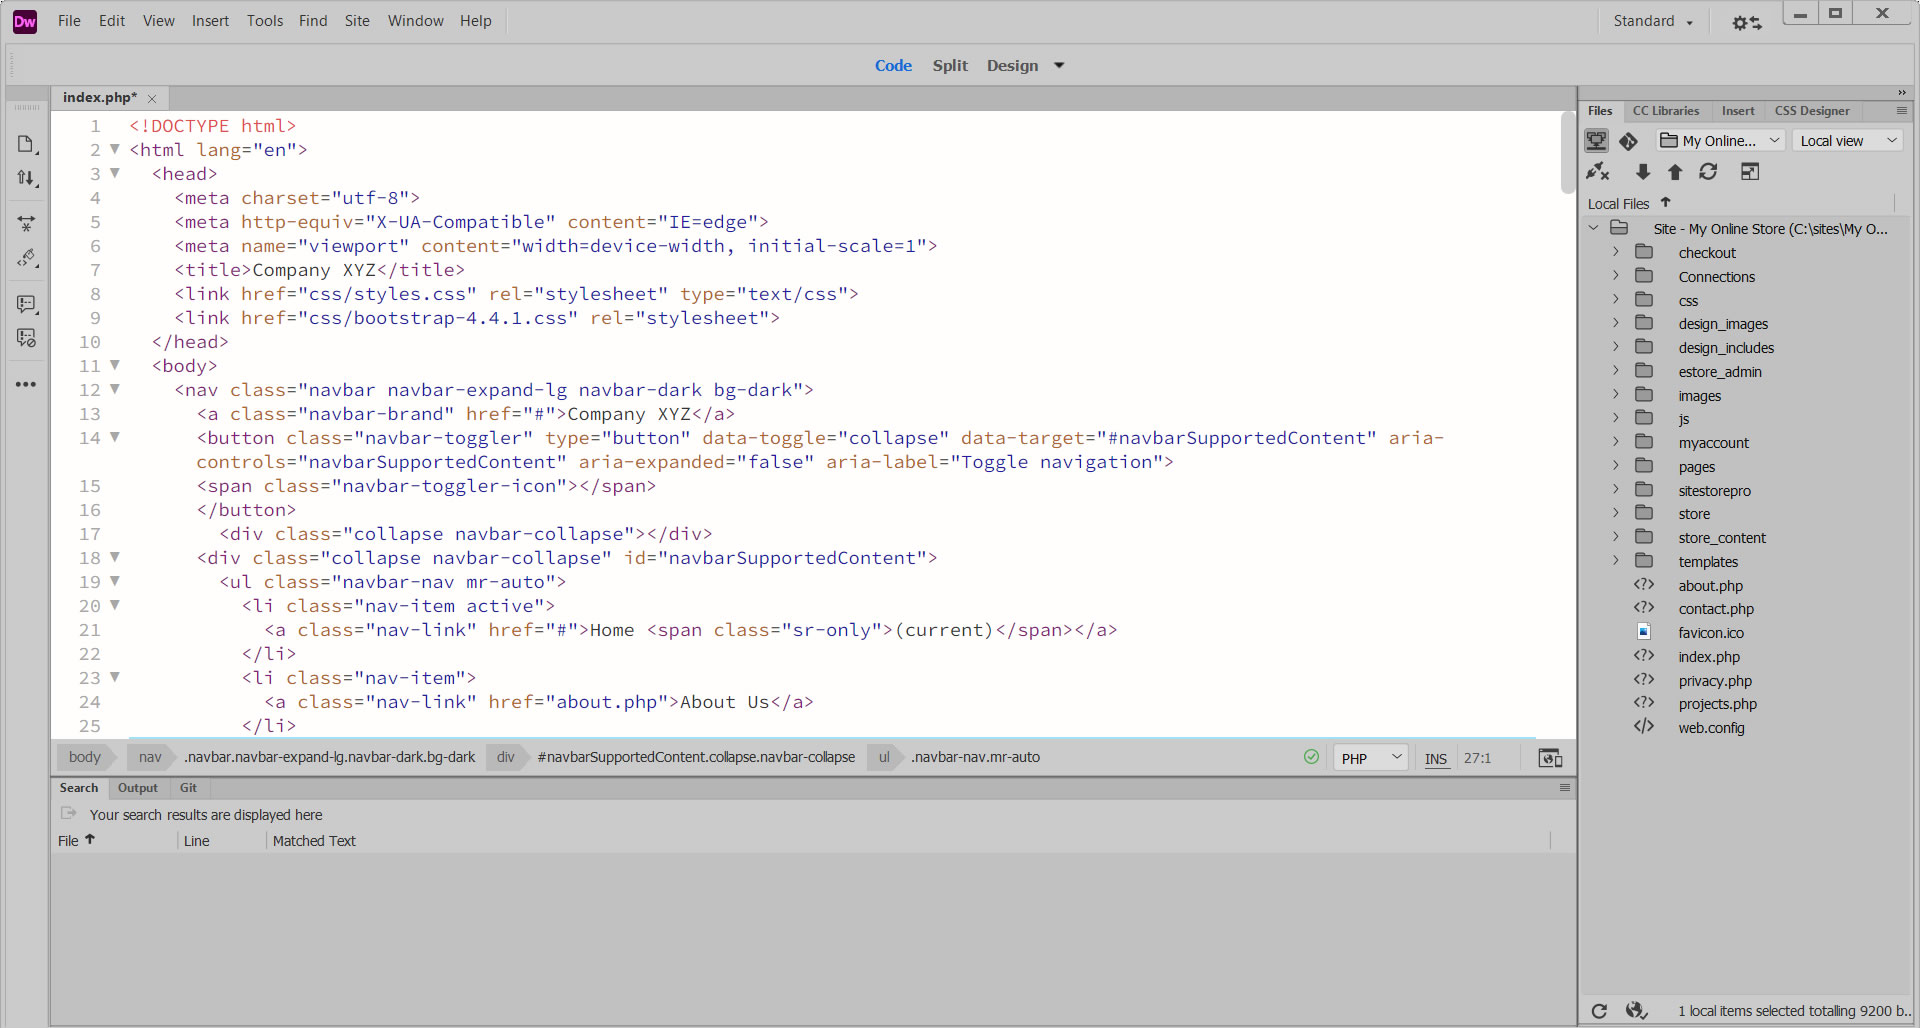
Below is a basic sample home page without any Site Store Pro content on it. It only has a simple top navigation bar and no dynamic content. (All content on the page is static and not pulled in from any external source).

Open up your preferred HTML editor to see your page's HTML code. In this example we will use Dreamweaver but you can complete the tutorial with any editor including NotePad.
Below is a screen shot of the top of the HTML code for the above sample page.
Using your code editor add the following line to the top of the page (above the <html> opening tag. If your page already has PHP code on it, place the include file ABOVE all other PHP code on the page.
<?php require_once('sitestorepro/loaders/framework.php');?>
The image below shows the include file on the page's code:

Note Regarding Relative File Paths: If you are editing a file iinside a sub-directory (folder) on your site (example: /mycontent/myfile.php) and not a file in the root directory (i.e. /index.php), you will need to change the path on the framework include file to ../sitestorepro/loaders/framework.php)
Next, select an area of the page that is easy to view (i.e the main content) and add the following test variable to the page to verify that the framework is being loaded.
<?php echo SSPRO_STORE_URL;?>
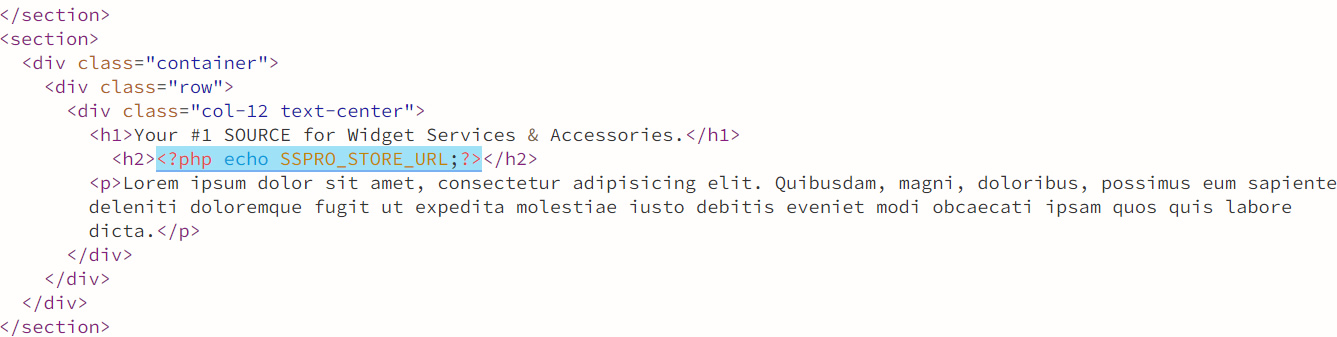
The above code snippet will output your site URL if the framework is working correctly.
Save your code changes and then view the page on your testing or online server (ie. FTP upload the file to the server where you installed the cart).
Your page should load the same as before but now include your SITE URL outputted in the area where you added it as shown below in the example highlighted in blue.
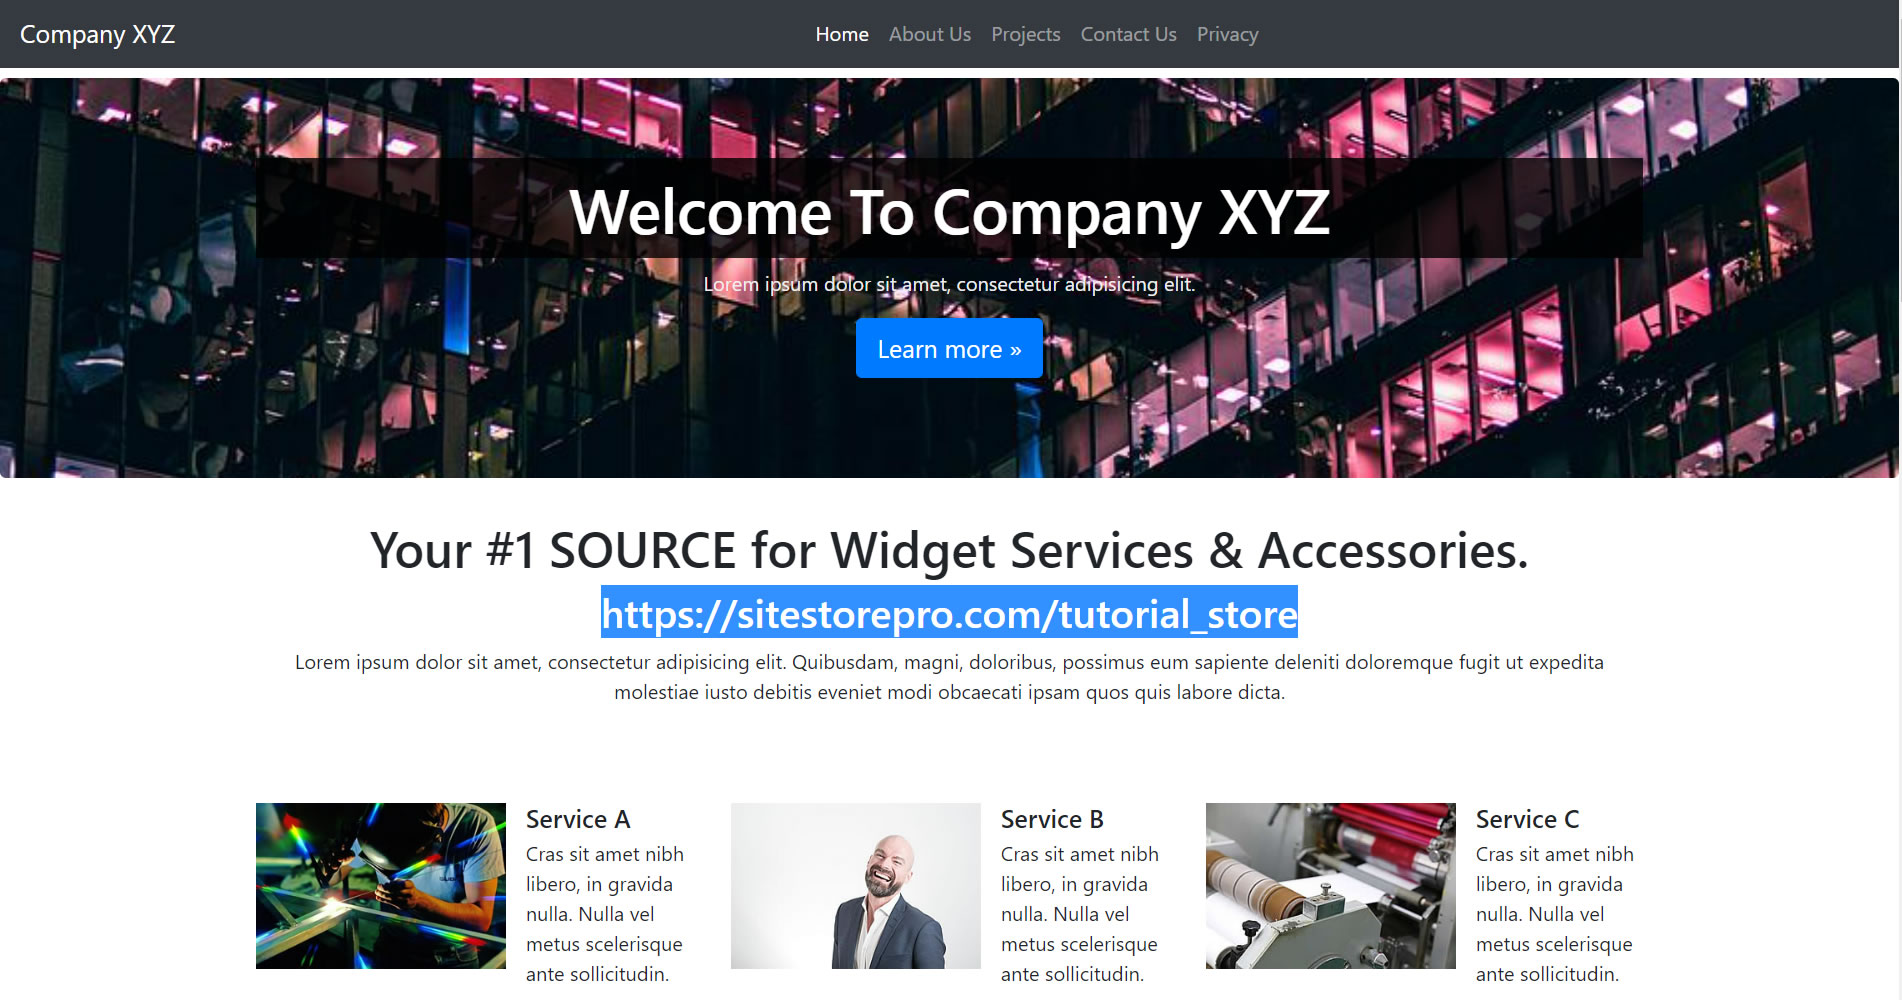
If your site URL is not displayed on your page, you are not viewing the saved page where you installed the cart (i.e. you are viewing it locally and didn't upload the saved file to where you installed the cart) . If you cannot get the SSPRO_STORE_URL variable to display your site URL on your page, please contact support for assistance.
Add A Plugin To Your Page Design
Now that the framework include file is installed and the test variable is working, you can remove the <?php echo SSPRO_STORE_URL;?> test code from your page and start to add actual cart features.
In this example, we will add a "Quick Cart Display" to your top navigation bar.
Note: Some of the Site Store Pro shopping cart features require specific CSS files, font-awesome icons and the jQuery library. If you do not have jQuery or font-awesome included loading into your site design, add the lines below to your site as well as the two required Site Store Pro files as shown:
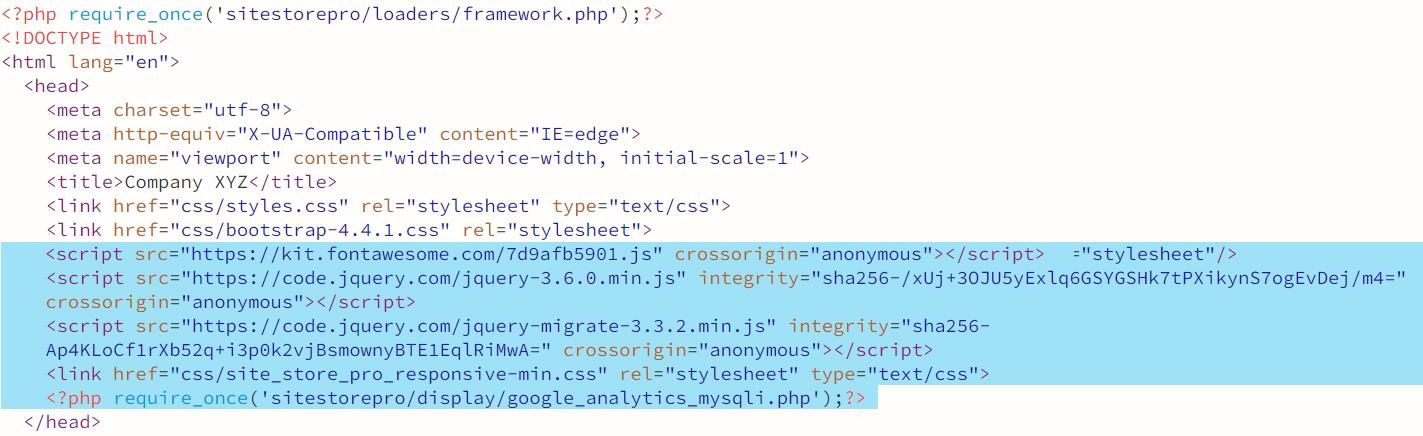
You can copy the code below for the jQuery, Font-Awesome script and the two required Site Store Pro files below: (Exciude the jQuery and/or font-awesome source lines if you are already loading those on your page).
<script src="https://kit.fontawesome.com/7d9afb5901.js" crossorigin="anonymous"></script>
<script src="https://code.jquery.com/jquery-3.6.0.min.js" integrity="sha256-/xUj+3OJU5yExlq6GSYGSHk7tPXikynS7ogEvDej/m4=" crossorigin="anonymous"></script>
<script src="https://code.jquery.com/jquery-migrate-3.3.2.min.js" integrity="sha256-Ap4KLoCf1rXb52q+i3p0k2vjBsmownyBTE1EqlRiMwA=" crossorigin="anonymous"></script>
<link href="css/site_store_pro_responsive-min.css" rel="stylesheet" type="text/css">
<?php require_once('sitestorepro/display/google_analytics_mysqli.php');?>
Note Regarding Relative File Paths: If you are editing a file iinside a sub-directory (folder) on your site (example: /mycontent/file1.php) and not a file in the root directory (i.e. /index.php), you will need to change the paths on the last two files above to ../css/ and ../sitestorepro/. You can also use absolute paths to the files (i.e /css/), if you are not testing your store in a sub-directory off your main site )
(The google analytics include file can be used to load external JS scripts that are specified in your admin area (i..e google tracking code) but, by default, the file only loads some required cart JS and CSS and does not include any Google analytics code. If desired, you can add your Google site tracking code inside your store admin area under Store Setup > Store URL > Google Analytics and it will automatically track all pages that load with the include file).
Bootstrap Info: Although this sample design uses the Bootstrap design framework, it is not required to run the cart.
Add "Quick Cart" Plugin To Your Page
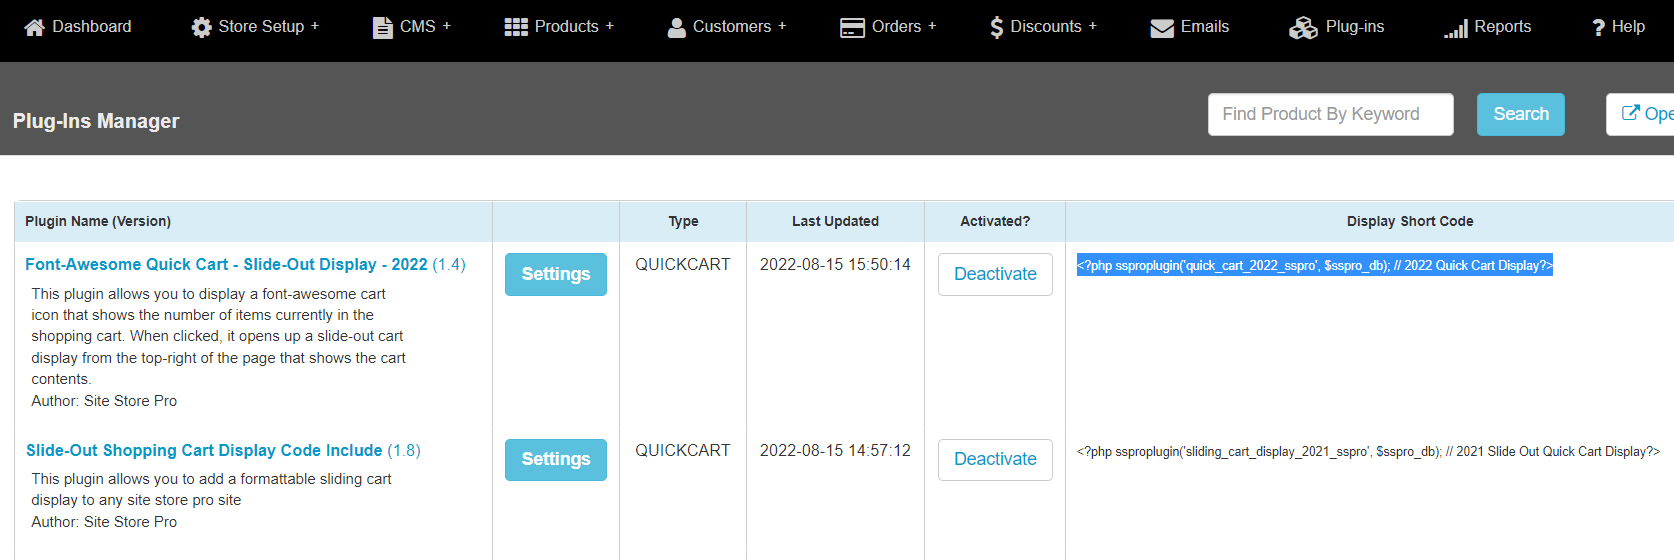
All plugins contain "short codes" to easily add them to your site.
Login to your admin area and go to 'Plugins' and scroll down to the"Font-Awesome Quick Cart - Slide-Out Display- 2022" plugin and copy the plugin shortcode as shown below:
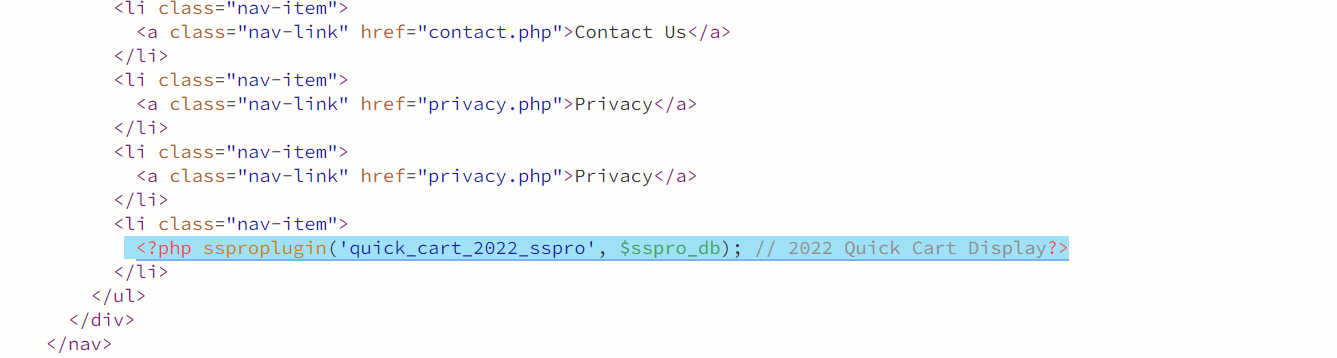
Open up your page in code view again and then add the following code to your top navigation area or wherever you want the cart status display to appear (i.e the header area, the footer area, on your top navigation menu, etc).
<?php ssproplugin('quick_cart_2022_sspro', $sspro_db); // 2022 Quick Cart Display?>For this example, we are adding the short code to the menu on a single page for demonstration purposes only. For an actual site design integration, you typically will add the short code to your menu include file so that it loads on all pages of your site ( Or, if are using Dreamweaver, you can edit your menu on your site's DWT template file to include the short code so that it applies the change to all pages assigned to that template.)
In the example below, we created a new list menu item <li></li> and added the short code as a new menu link.
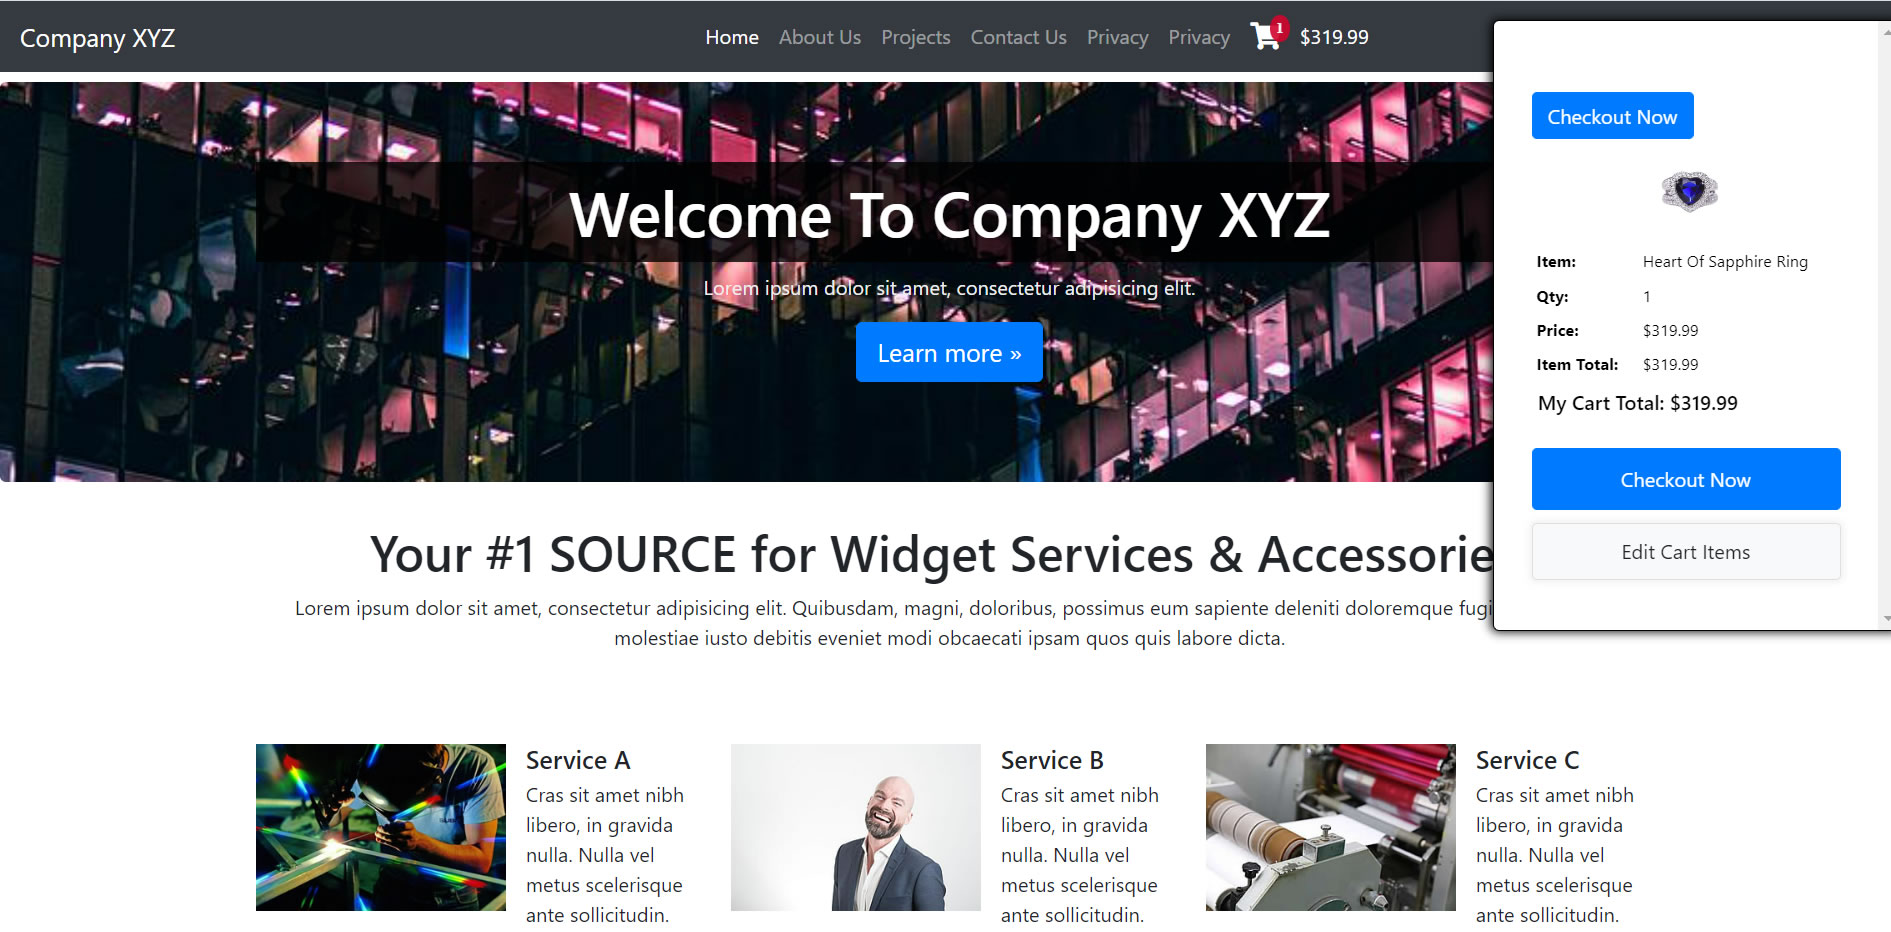
After saving the file and viewing it on our testing server, the new menu list item appears as a Font-Awesome Cart icon.

If we visit the online store (i.e. /store/ and add an item to the shopping cart and then return to our sample home page, the cart icon show the # of items in the cart and the cart sub-total amount automatically. (if you installed the 'demo content" when doing your installation, your store will already have sample items to add to your shopping cart).

If you click on the font-awesome cart icon, it will open the sliding cart display from the top right of the page that shows the current cart contents.
You have now added the a basic cart feature to a stand-alone design page that was not previously linked into the cart system. Now that the framework has been included in the page and the cart functions are working, you can replicate the framework inclusion into your other site files so that all pages on your site can benefit from full cart functionality.
The next tutorial - Using the Cart Plugins In Your Own Design (Part 2) - will expand on the plugins integration and add more dynamic content to the same home page including some content scrollers will add-to-cart functionality and some indivdual "buy now" buttons.