Web Designer Version - Design Integration Tutorial - Previous Platform (Gen 3)
Note: This tutorial is for the previous plarform of Site Store Pro. If you have downloaded Site Store Pro after August 1, 2023, please view the new 4th GEN version tutorial.
If you are creating a new website and using the include sample store (website) as your starting point, this tutorial will show you how to quickly modify the sample store design with a custom design.
Note: If you are a paid support plan user, you are entitled to one FREE design integration. If you provide a working layout of your design in HTML, we will apply it to your store files and set it up on your host / server.
Install Your Web Designer Shopping Cart First
If you just downloaded your Web Desiginer Shopping Cart version and have not installed it yet on your hosting account or local server, please review and follow the Install Guide before proceeding with your design integration.
After you have extracted all the folders / files from the "New Installation" folder to your local design directory, open up your preferred HTML editor to view the copied files. In this tutorial, we will be using the free Microsoft Visual Studio Code editor but you can use any other editor such as Dreamweaver, NotePad++, Atom, etc.
Below is the directory structure of the copied sample store (website) folders/files:

Site Store Pro Designer Version comes with 11 folders and a few root files but only the highlighted folders and files will be modified during the design integration process.
You will not be editing any of the files or folders in the /sitestorepro/ or /estore_admin/ folders and most likely will not be editing any of the other folders that are not highlighted above in blue.
Open The Sample Website Home Page (/index.php) in your HTML editor
Open up the root home page file (/index.php) in your preferred HTML editor to see the design structure of the page. Below is a screen shot of the HTML structure of the /index.php sample home page file.
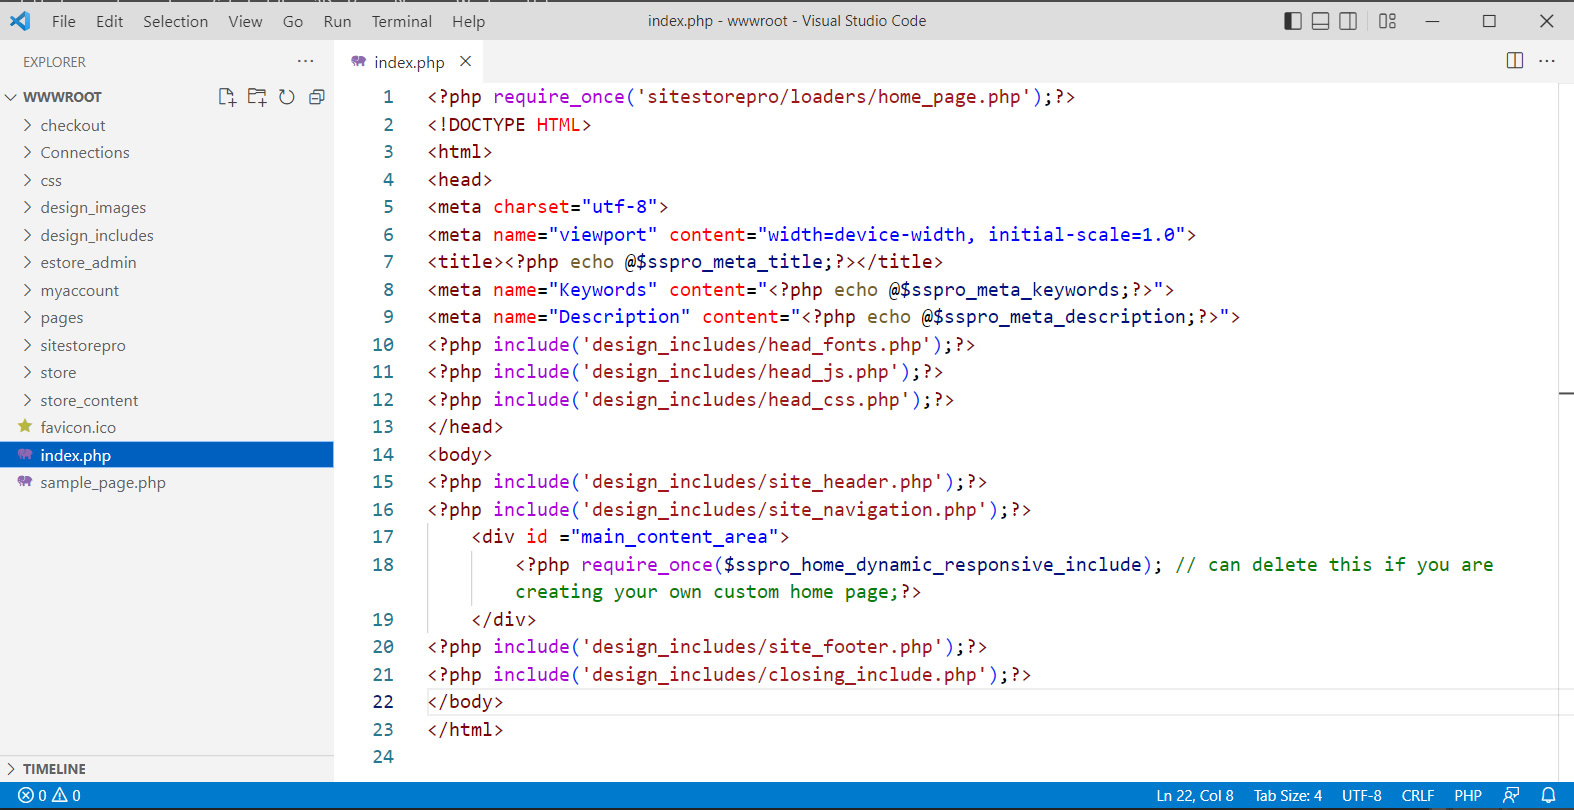
Sample Store Design HTML Structure Overview
From top to bottom, the follow design and dynamic content elements are included in the sample store design:
Above - Cart Framework PHP Include File (Required Content): The include file that is above the page opening tag is required and should never be removed. It loads the cart framework. Each of the shopping cart pages (i..e the cart display, product view, checkout, etc) has a specific loader file. However, if you are creating your own new page, you will want to use the generic cart loader file called /sitestorepro/loaders/framework.php. If you open the sample_page.php file in root, you will see the generic cart framework file attached to the file above the opening tag. If your site will have any PHP code above the tag, make sure that the cart loader file is above everything else and will load first on the file.
Meta Tags: Title, keywords and description meta tags include dynamically generated content that is pulled in from the web-based admin from the application's include "Home Page" Manager system. This content is optional on the /index.php file. If you want to specify the home page's meta tags manually, you can just remove the three php variable echo statements. Please note that you can manually specify any header content in your site's home page and any other root files or any new pages you create, but do not remove the dynamic meta tags content in the files located in /store/, /checkout/, /myaccount/ or /pages/ files. Meta tags elements in those pages are required and should not be edited or removed.
Page Content: The sample store design loads the content into the ... area with include files so that it is quick and simple to add new content to the entire site without having to manually edit each page. The three includes are self-descriptive in their naming convention:
- /design_includes/head_fonts.php : loads any side-wide required site font files (i.e. Google fonts)
- /design_includes/head_js.php : loads any site-side required JS files such as jQuery
- /design_includes/head_css.php : loads any required site-wide CSS such as the site's main styles filer
Site Header Area: The design's page header area is loaded from /design_includes/site_header.php
Site Navigation: The design's top navigation menu is loaded from /design_includes/site_navigation.php
Main Content Of Page (Required Content):* The page's primary content is loaded into the 'main_content_area' div. On the sample store's home page, the content is being loaded dynamically into the page using the included "Home Page Manager" system in the admin area. However, you are free to delete the home page content include file and add your own static HTML content instead. For a step-by-step guide on building out a home page with a combination of static and dynamic content, please see the tutorials (Using the Cart Plugins In Your Own Design (Part 1), Using the Cart Plugins In Your Own Design (Part 2).
* IMPORTANT * Do not remove the 'main_content_area' div and/or any PHP code inside the main_content_area div on any file in /store/, /checkout/, /myaccount/ and /pages/. The PHP code inside the main_content div in the /store/, /checkout/, /myaccount/ and /page/ files loads the dynamically generated shopping cart application content and the specific file's required CSS.. You can remove the main_content_area content on the sample store home page (/index.php) and replace it with your own static content but do not remove the 'main_content_area' div and the few lines of PHP code inside 'main_content_div' on any other file in the application. Each core cart application page will include a small PHP snippet like the example below.. (This is what cannot be removed)
Site Footer: The design's footer content is loaded from /design_includes/site_footer.php
Closing Include File: The final include file in the page structure loads required content such as jQuery rules.
What Page Elements Are Required On All Site Designs?
You are free to remove or modify any of the above detailed sections except:
- The cart framework include file on top of the file
- The required JS and CSS files that are being loaded in the head include files (see below)
- The main_content_area (exception is the root home page /index.php file as explained above)
- The closing include file.
When creating your own design, you might need to add your own JS files and some additional CSS files for your custom site design and visual appearance.
You can edit all three design include files in the section and add your own content to the files. You can even combine them all into one file or add the content directly to your pages instead of using includes.
However, whatever content you decide to add or remove, make sure that your site pages load :
- Current Version of the jQuery Library
- Minimum 3.2.2 Version of jQuery "Migrate" Component
- Site Store Pro Application Core CSS file: /css/site_store_pro_responsive-min.css
The above three elements are required for cart operation. The primary CSS style sheet that controls the general page appearance such as page width, header formatting, page font sizes, link colors, etc for the sample store design is /css/main_stylesheet_responsive.css and that may end up being replaced by your own custom primary site stylesheet but the /css/site_store_pro_responsive-min.css must load on all pages as well as the jQuery library and jQuery Migrate either through an include file or a direct hardcoded page reference.
Modify Some Design Elements To Customize Your Install Appearance
Now that we have gone over the sample store structure and the required elements for any site design page, let's do some some design modifications to demonstrate a simple 'reskinning' of the sample store design and illustrate some do's and don'ts.
For the first modification, we will move the primary navigation bar up the file above the main header content by simply changing the page include file ordering on the home page file.
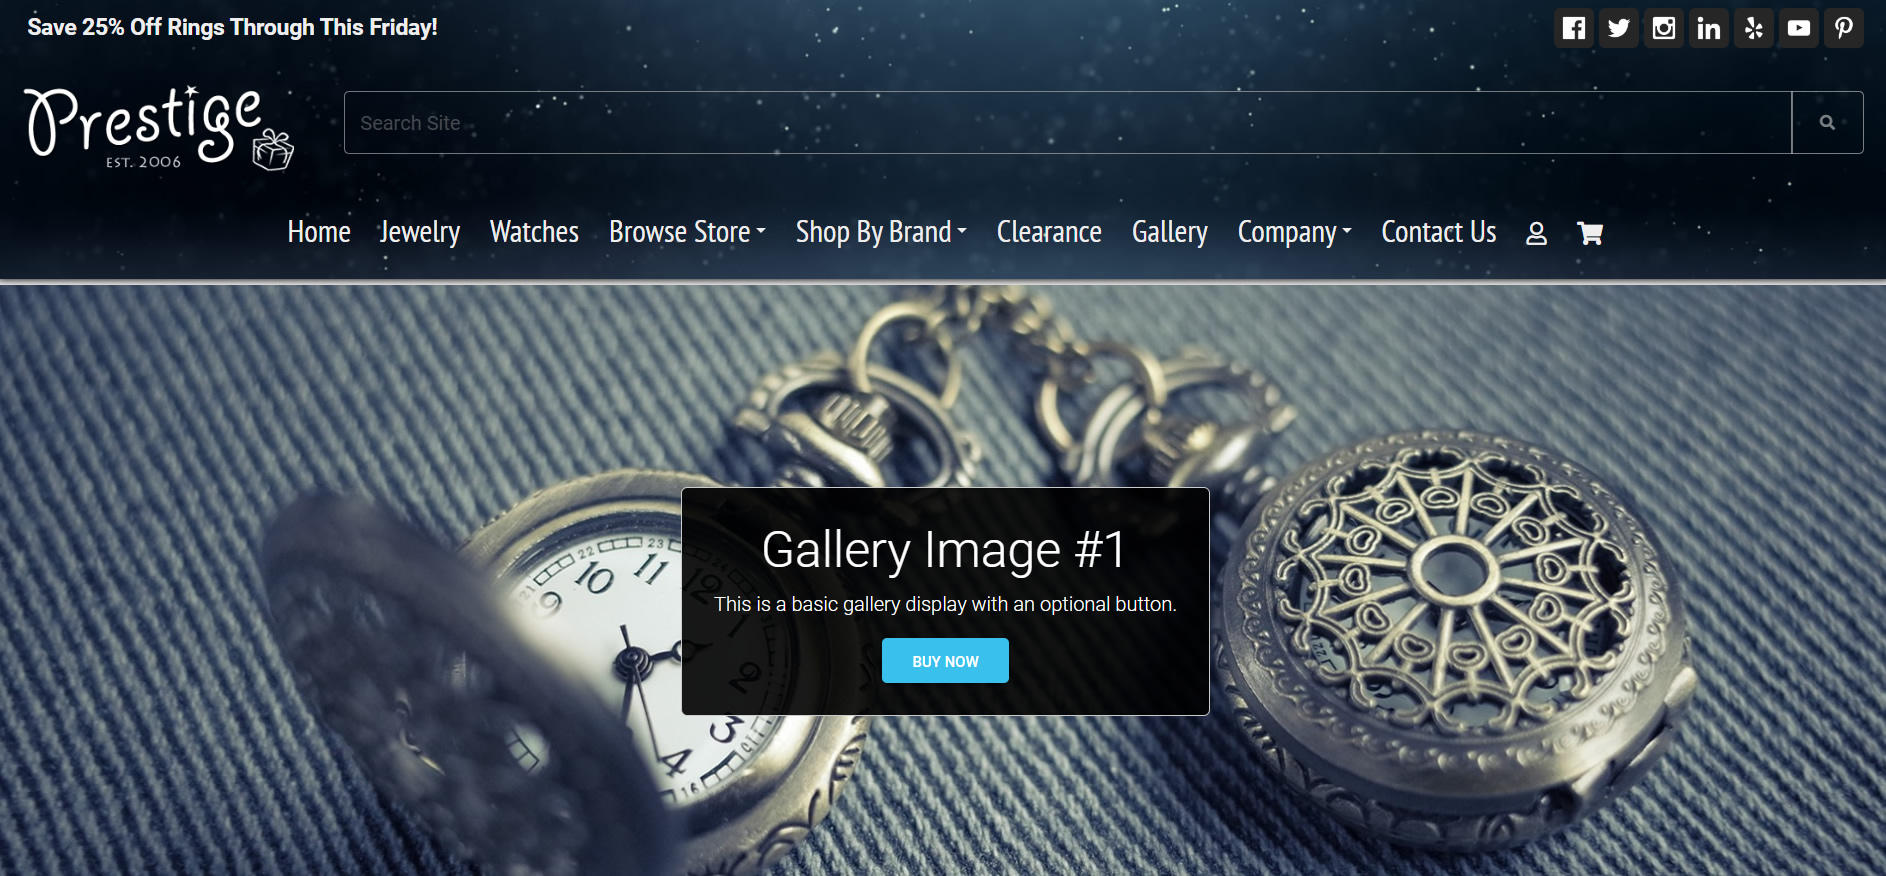
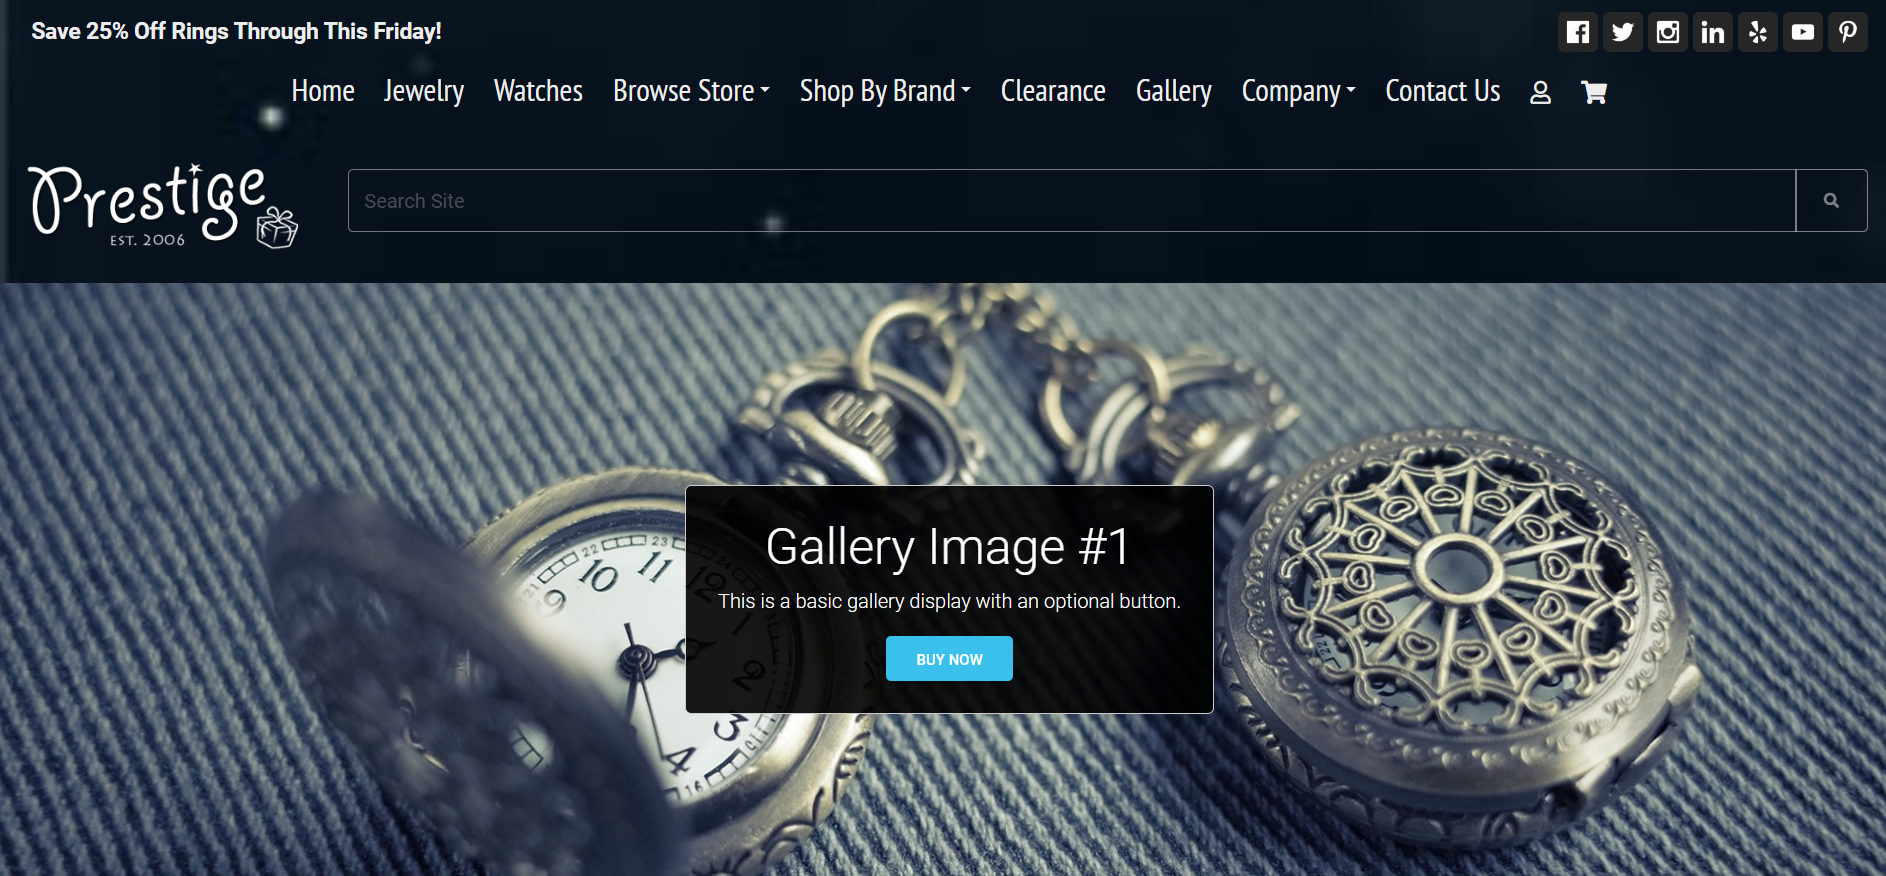
Below is the default sample store home page.
If we move the navigation bar include file above the header as shown below, the top navigation will show up on the page above the header:
While this is very quick edit, the problem is that every page (file) in the sample store wesbite will now need the same structural change.
(Note: if you are using your own existing custom design, your include files may load in a nested-fashion, where you can change the structure for the entire site by only editing one file in a nested include tree. However, for simplicity purposes, the sample store uses individual stand-alone design includes.)
Instead of making a structure change that need to be duplicated on a few dozen files, lets simply move the content from inside our top navigation include file and place it in the header content include file where we want the navigation bar to appear. This will automatically apply the same change to all files on the site.
Open up the /design/includes/site_navigation.php file in your HTML editor and cut out all of the content from the file as shown below:
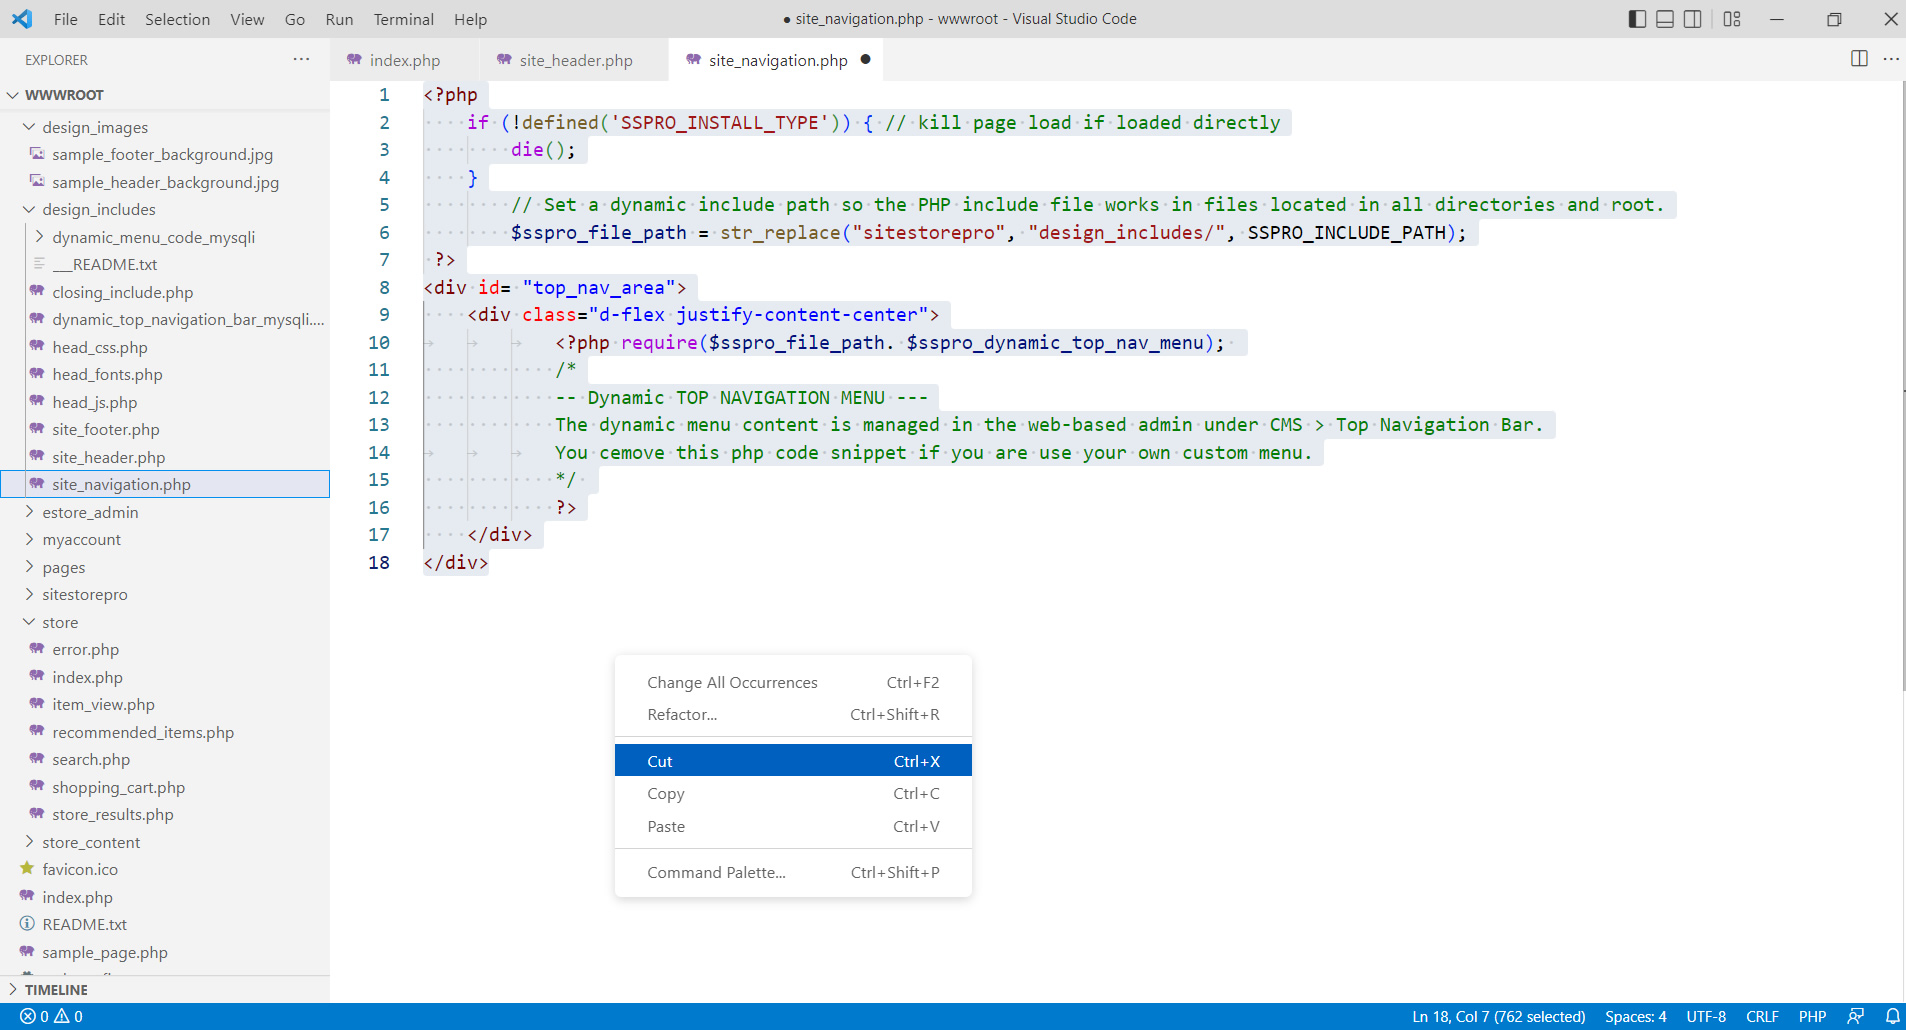
After cutting out the content, your site_navigation.php file should be completely empty. Save the file with the contents removed.
Open up the /design_includes/site_header.php file and paste the contents you cut out of the site_navigation.php into the header file as shown below:
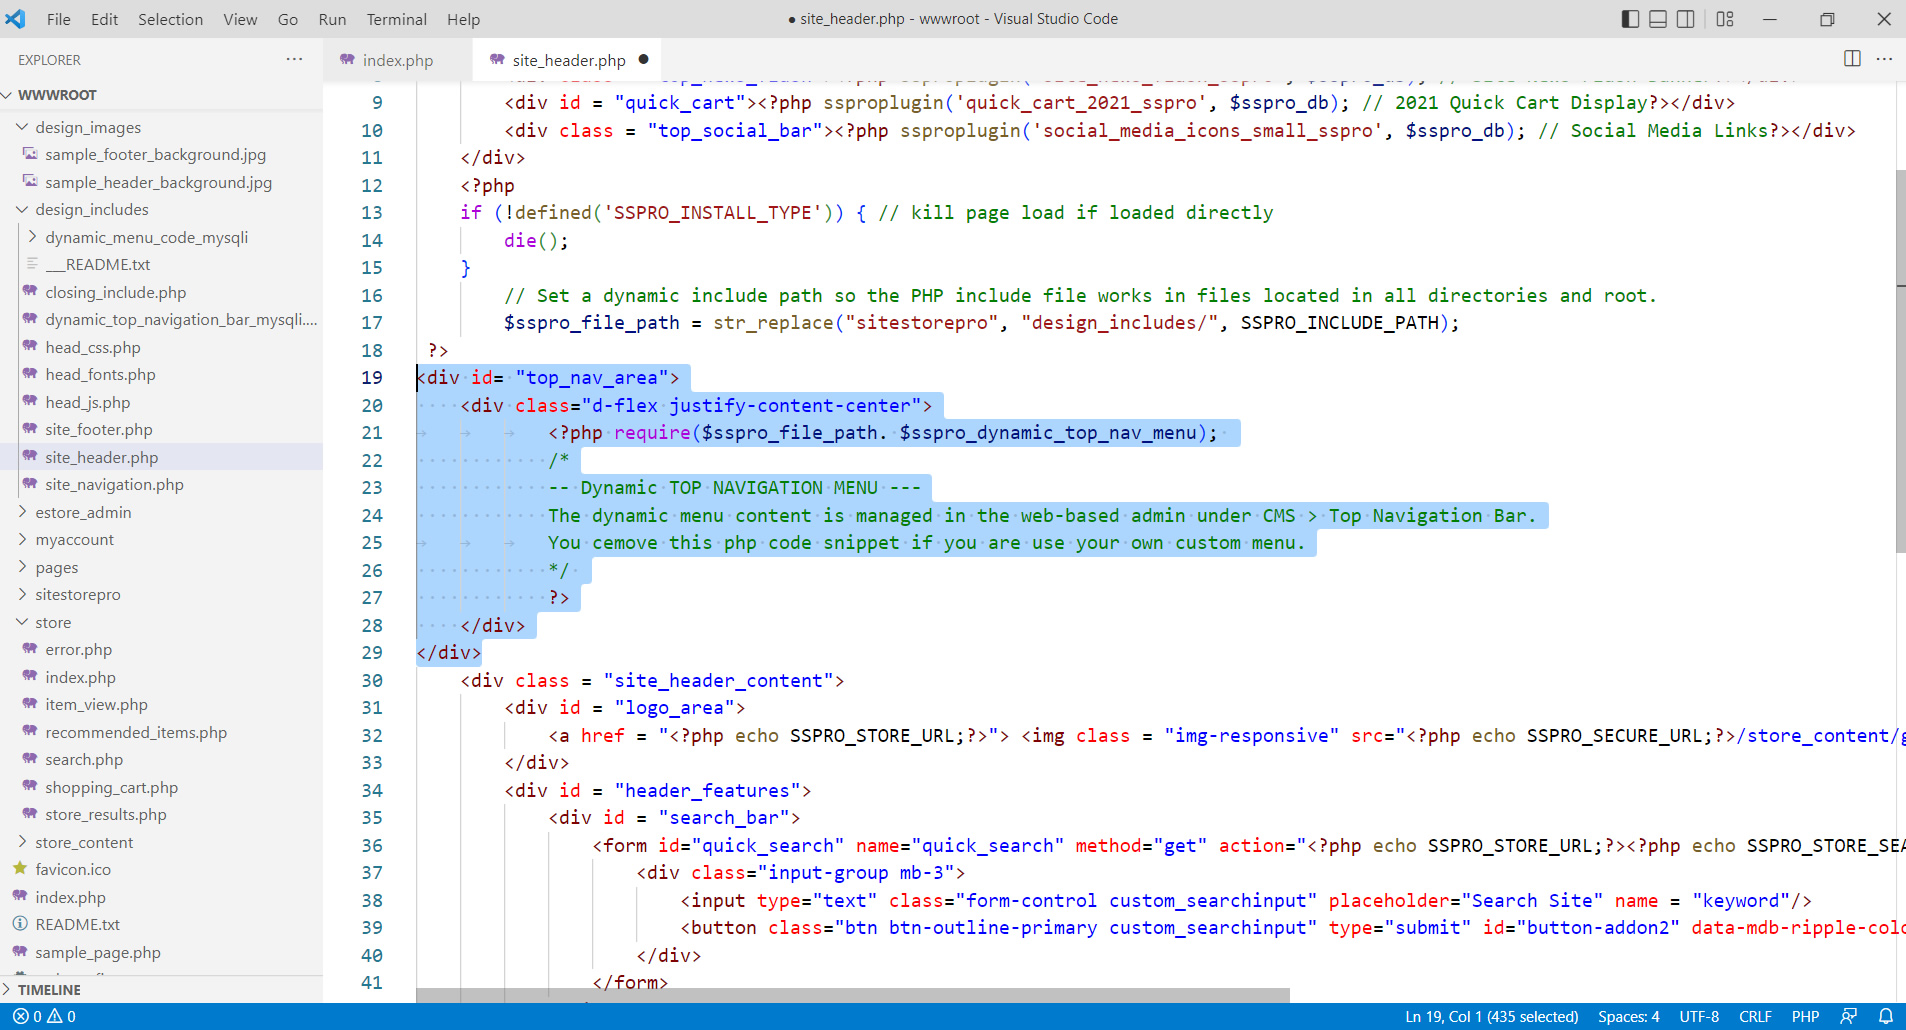
For this demonstration, we moved (pasted) the top-navigation contents above the 'site_header_content' div and below the 'top_sharing_div'.
It may be counter-initiative that we moved the top-navigation menu content from the site_navigation.php include file.
However, using this method allows you to apply the modification to the entire site and you can also revert back to the previous layout instantly by just moving the top navigation content back into the top-navigation include file.
Make sure you have saved your empty site_navigation.php file at this point or you will have two identical menus loaded on your page.
Note: it doesn't matter if your site is loading an empty include file. You can even use the empty file to load other content that is not a menu. (For a production site, if you don't want an include file being loaded that does not contain the specified content, you can rename the include file to something else and update the include reference line in the HTML code with the new file name site-wide using a "find-and-replace in all files" in your editor. For this tutorial however, you can just leave it as is (blank).
If we view any page on our sample store website now, the menu will be moved up the header to right below the sharing bar.
Edit CSS To Change Visual Appearance
Now that we have demonstrated a basic page layout (structure) change by modified two of the design include files, we will make a couple of quick CSS edits to the sample store to change the appearance of the header.
(Note: for the remainder of this tutorial, we will be using Dreamweaver in the screen shots but you can still use any HTML editor.)
Site Store Pro now loads minified versions of CSS files to increase page load times. Every CSS file in the sample store includes both a regular CSS version and a minified version that ends with -min.css
During development, it is easiest just to copy the contents of the non-minified version of a file and replace the minified CSS content so it is easier to edit. If you want to minify the content later for production use, that is a very simple. (If you don’t know the difference between a minified CSS file and non-minified CSS file, simply open up both versions and you will see the minified version doesn’t have any comments and white-space)
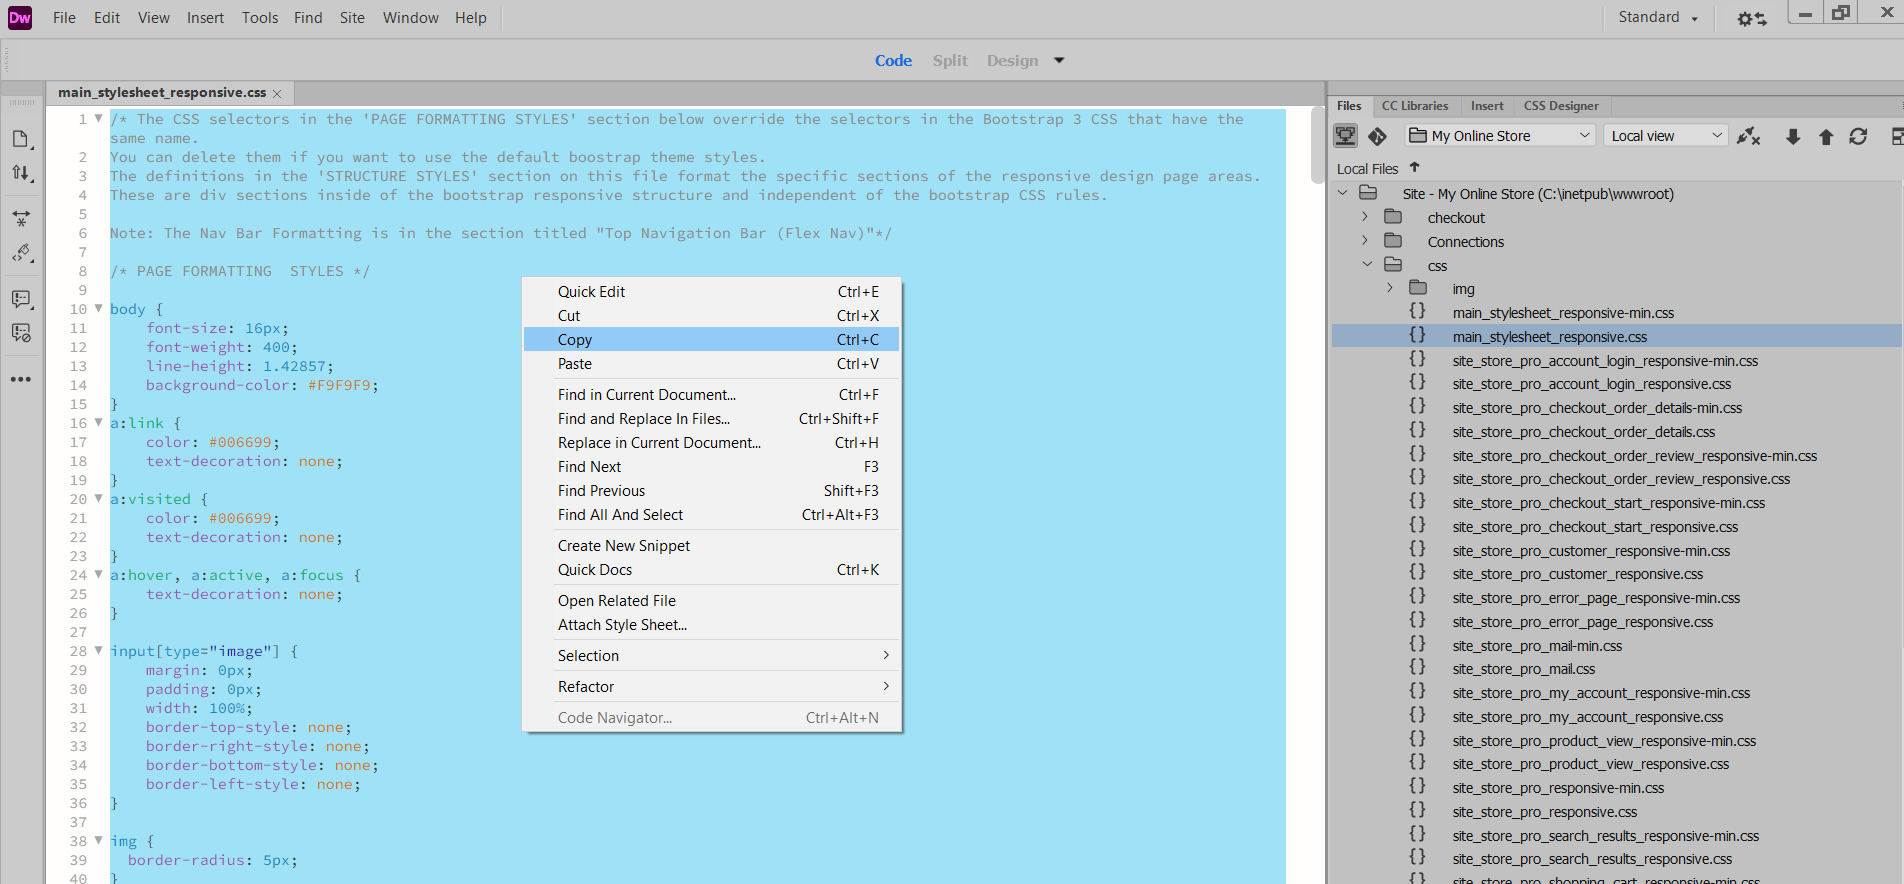
Open up /css/main_stylesheet_responsive.css and copy all the contents of the file by clicking on Edit > Select All (or Ctrl-A) and then right click and click ‘Copy’
Next, open the minified version of that file (main_style_sheet_responsive-min.css) and select all the content in that file and paste (replace) the content with the non-minifed CSS. (you could have also just over-written the -min file version with the regular one instead.. end result is the same.).
You now have two identical main_style_sheet_responsive CSS files. Close out the first file that does NOT end in -min.css so you don’t accidentally edit the wrong copy of the file.
The “new” version of the main_stylesheet_responsive-min.css should still be open in your editor. Scroll down the file until you reach the section commented as STRUCTURE STYLES.
Modify the #site_header CSS rules shown below:
#site_header {
  background: url('../design_images/sample_header_background.jpg') no-repeat;
  background-size: cover;
  z-index: 2;
  width: 100%;
  box-shadow: -1px 3px 7px -2px rgba(0,0,0,0.94);
  margin-bottom: 5px;
}
By removing the two background image lines and adding a new rule to set the background-color to black (#000).
#site_header {
  background-color: #000; /* add black background color to top sharing section. */
  z-index: 2;
  width: 100%;
  box-shadow: -1px 3px 7px -2px rgba(0,0,0,0.94);
  margin-bottom: 5px;
}
Next, modify the #top_sharing_section CSS by adding a background color to the current rules as shown below:
#top_sharing_section {
width: 100%;
display: flex;
background-color: #3399CC; /* add blue background color to top sharing section. */
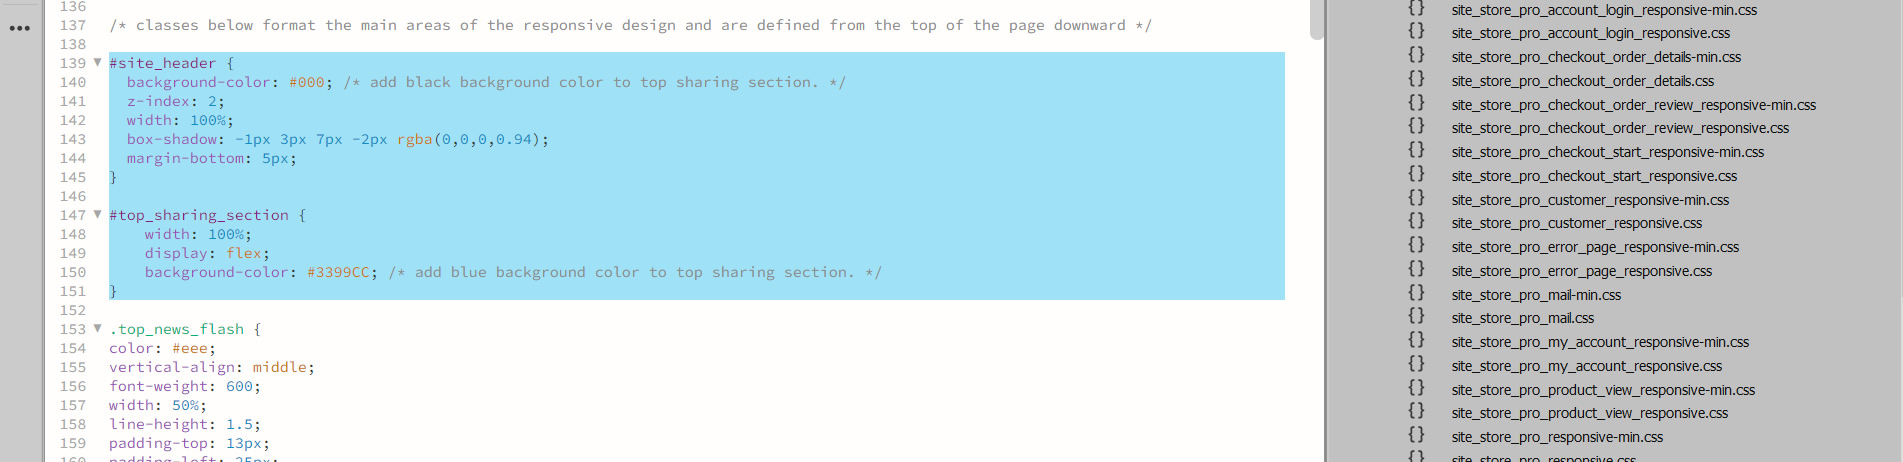
}Below is are both modifications applied to the /css/main_stylesheet_responsive-min.css file
Save your CSS file changes (File > Save) and then post the modified file to your webserver and view one of your pages at your installation URL and you will see the modifications. (if you don’t see the modications, refresh your browser a few times or clear your cached content so you force a refresh of the CSS file in your browser’s cache)
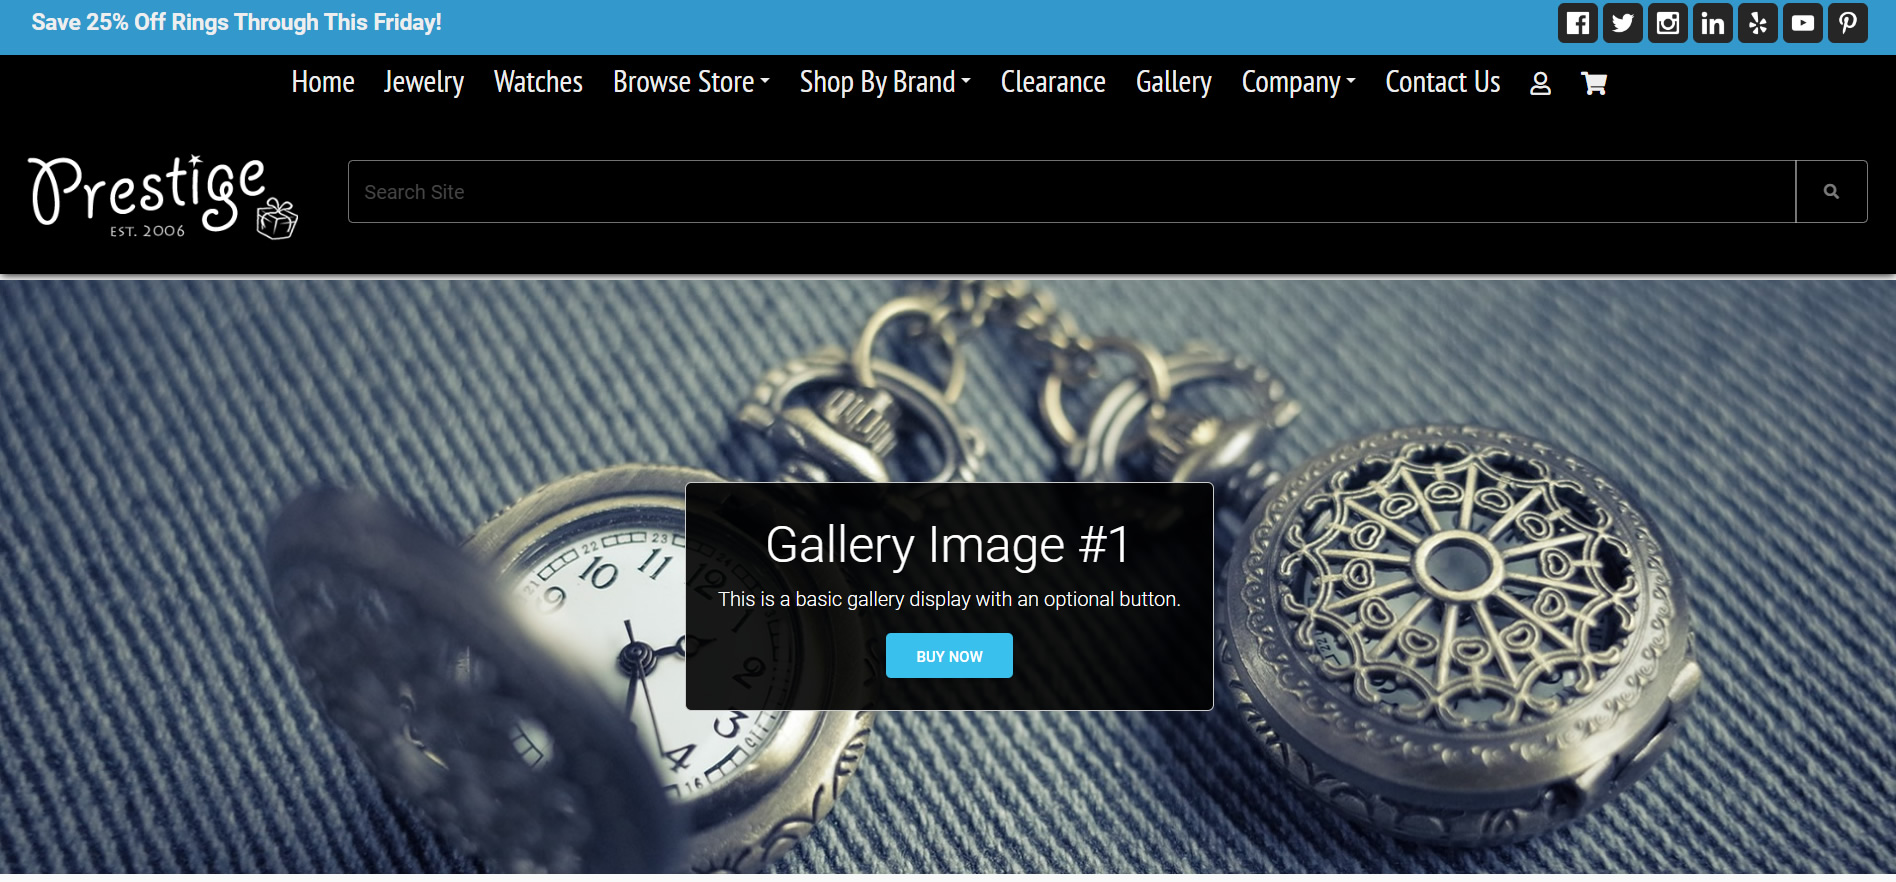
Below is screen shot of the changed header design:
Upload a New Dynamic Logo Through Your Admin Area
The sample store, by default, includes a dynamically generated header system where content is controlled through the admin and the appearance (formatting) is controlled via the CSS as per the above example. The header system is loaded into the page content by plugins shortcode, php include files and a dynamic logo variable. The various dynamic sections in the page are commented in your Dreamweaver template to assist you in learning what they are and how you manage them.
Even though the sample store contains dynamic features such as the header and footer, all sections can be replaced with static content if you prefer to manage the page content with you HTML editor instead of the “hybrid” sample store design which is combination of both static and dynamic content.
For this final example of modifying the sample store design, we will upload a new logo through the web-based admin and it will replace the current one dynamically.
Login to your web-admin area at /estore_admin/ and go to CMS > Site Header Logo Upload as shown below.
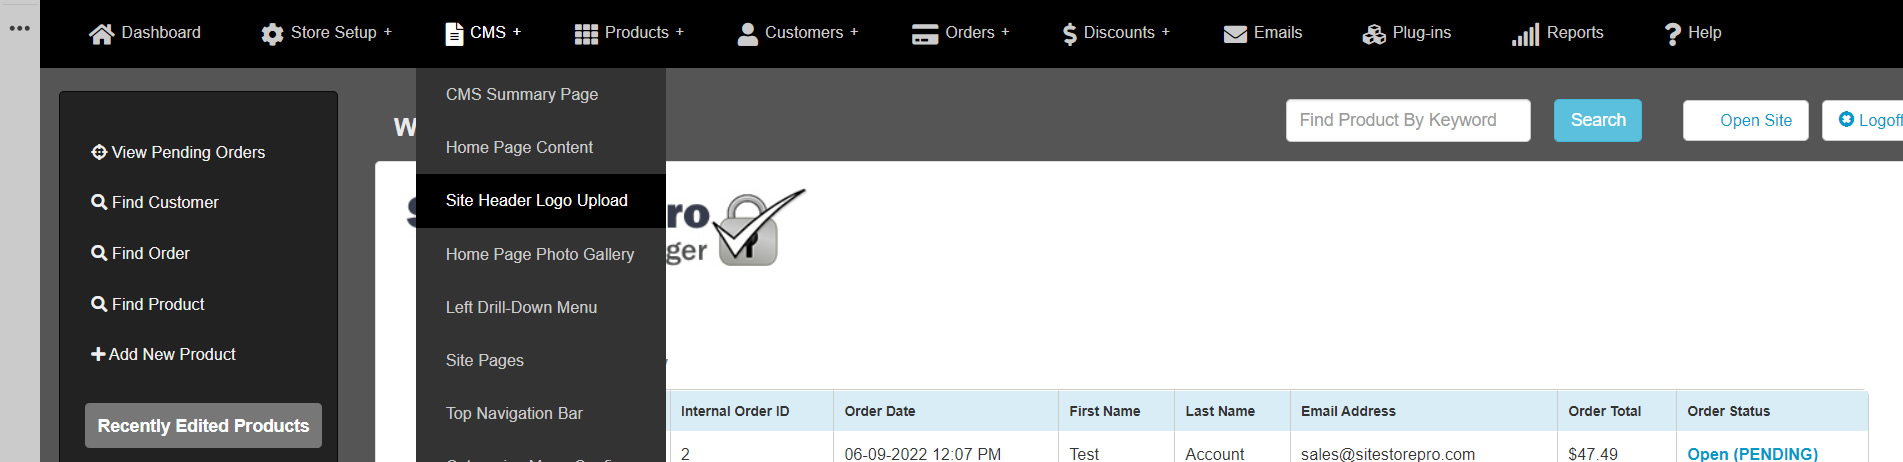
When the logo upload page opens, select a new logo from your local computer with the “Choose File” button and then click on the “Update Configuration ” button as shown below:
After you click on the “Update Content | Configuration’ button, your new logo will be instantly visible on the page and it will be changed in real-time on the site. Unlike site design / layout changes and CSS modifications, ALL changes made through your web-based admin are real-time and instantly viewable on the site. If you don’t like the logo you uploaded, you can simply upload a new one and it will automatically replace the content.
Below is a screen shot of the sample store with the new logo . (Your sample will look different unless you upload the same demo logo. If you want to upload the same logo we used in this example, click here)
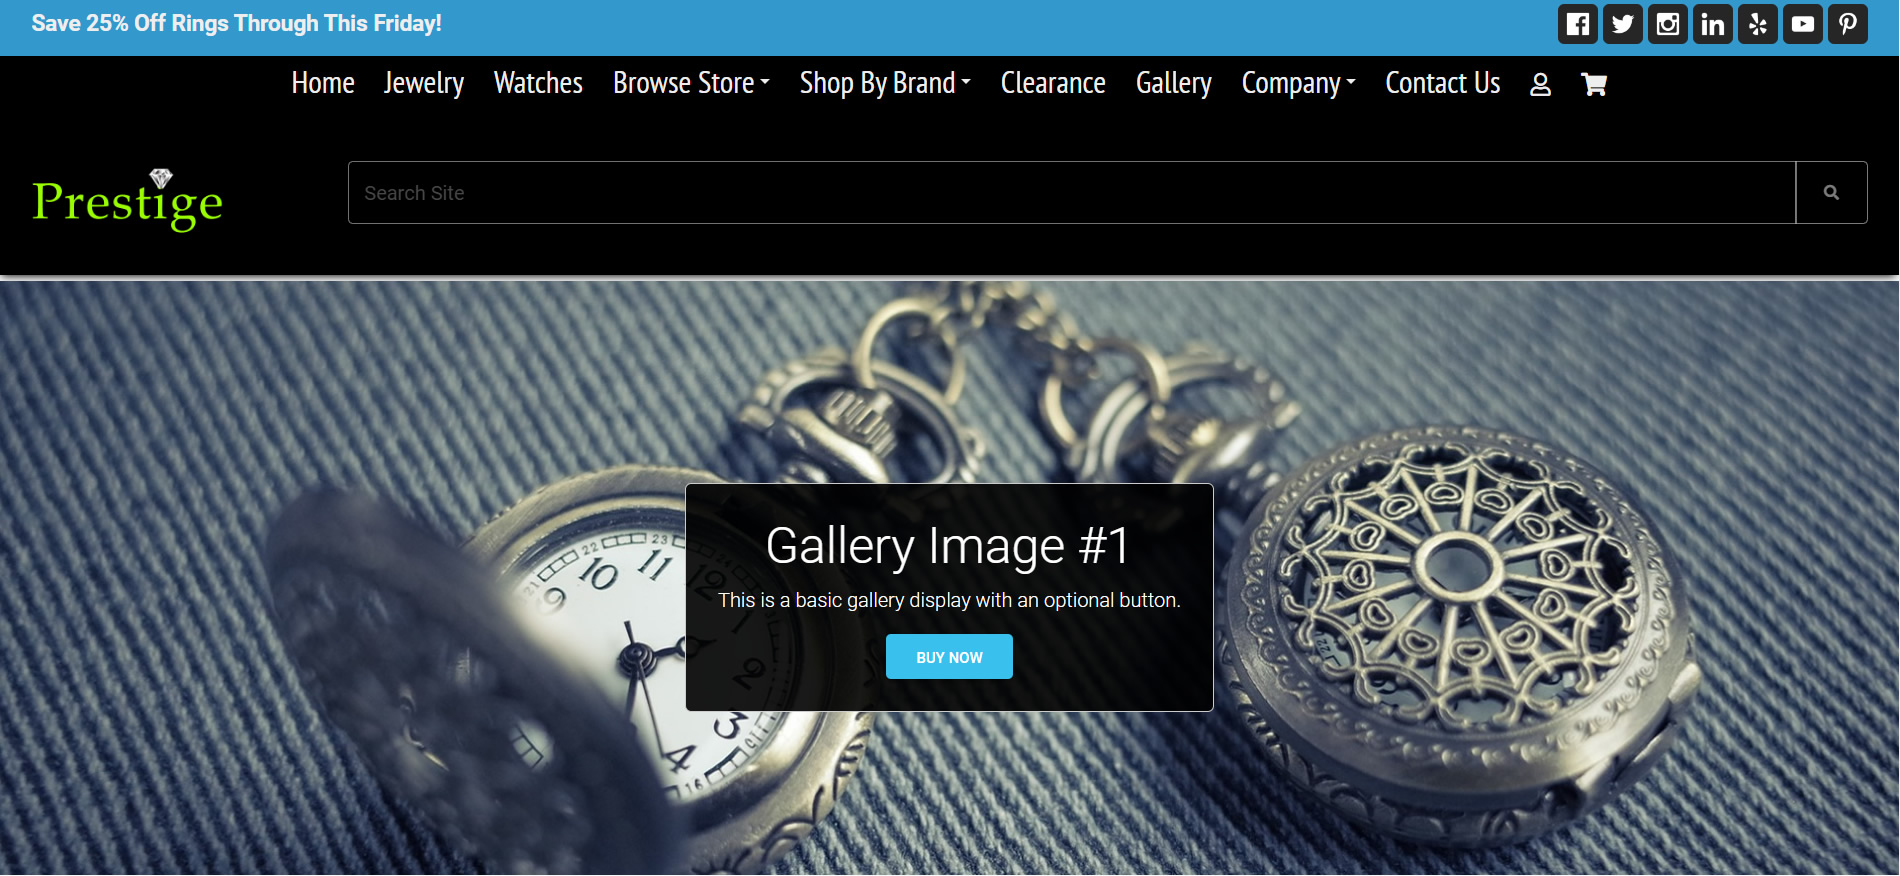
Congratulations! You have modified the sample store HTML layout code and changed the website's appearance with some CSS edits in the main website style sheet. Hopefully, with the methods presented in this tutorial, you will have a good starting point to customize the sample store with your specific design vision.
If you need any assistance with your shopping cart design integration, please do not hesitate to contact support. Don't forget that with paid support plans, we offer a free design integration for your site if you provide a working HTML example of your design.