Product Materials (Option) Management
Materials are added into the system and then can be assigned to ANY product (global product option).
To reduce the amount of time required to manage your item options, product Materials should be added into the system BEFORE adding the actual products that the Materials will be assigned to (associated). However, new Materials can be added or edited at anytime and then associated with existing products.
Materials are added into the system by clicking on the ‘Products’ tab and then the ‘Materials’ link under in the left menu.
After adding Materials to the system, they can be assigned to any product by clicking the ‘Materials’ tab in the Product Manager.
To assign a Material to an item (product), simply click on the ‘Include’ check box next to the Material and then click the ‘Update’ button after all Materials for a specific item have been checked “on”.
To remove a Material assignment, simply uncheck the Material and then click the ‘Update button’.
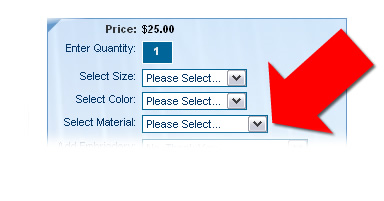
Assigned Materials will be displayed as a list selection menu on the product details page as shown below:
Note: An additional fee can be included when adding a Material to the system. If a fee is assigned (entered) for a Material, it will be added to the base price of the item when the Material is selected by the customer. It is highly recommended that you include the fee in the Material name (title) when entering it in the system. For example: If you enter the Material title as “5” and assign an additional fee of $2.00 to the record, the title should actually be entered as “5 (+$2.00). Including the fee in the Material name will not only let the customer know that there is an additional fee associated with a specific item Material, but will also prevent the admin from assigning the incorrect Material to an item when two Material records have the same name but only one of them has an additional fee assignment.